Element의 attribute(속성)
1. 태그의 속성
1. 태그가 갖는 속성이기 때문에 속성명을 그대로 사용
- tagName.id , tagName.src
2. class 처럼 여러개의 값을 가질 수 있는 경우, 별도의 속성명을 사용
- tagName.classLIst
<img src="/image/토토라.png" alt="이미지 없음" id="imgTag" class="A B C">
<!-- class안에 띄어쓰기를 사용하는 경우,
class를 여러개 넣는다는 의미 (A, B, C를 넣음) -->
<script>
const imgTag = document.getElementById('imgTag');
//img태그의 속성들 id, src, alt, classList 콘솔에 찍어보기
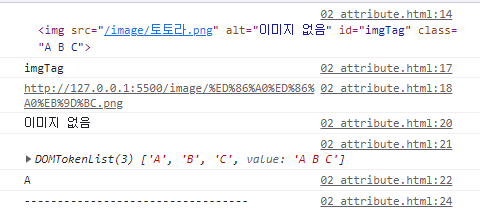
console.log(imgTag.id); //imgTag
console.log(imgTag.src); //http://127.0.0.1:5500/image/%ED%86%A0%ED%86%A0%EB%9D%BC.png
// 이름이 한글이라 깨짐 = 영어로 저장하는 것을 추천
console.log(imgTag.alt); //이미지 없음
console.log(imgTag.classList); //DOMTokenList(3) ['A', 'B', 'C', value: 'A B C']
console.log(imgTag.classList[0]); //A
console.log('----------------------------------');
for(const key in imgTag){
console.log(key,':',imgTag[key]);
} // 전체 속성확인 가능
</script>
<style>
.yellow{
background-color: yellow;
}
.black{
background-color: black;
color: aliceblue;
}
.red{
background-color: red;
}
</style>
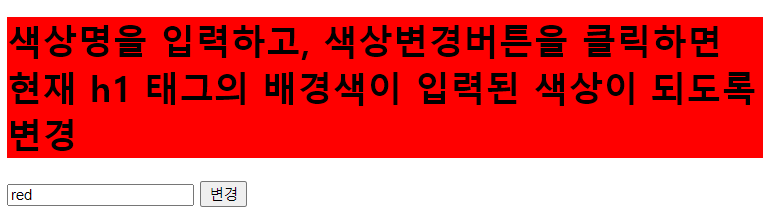
<h1>
색상명을 입력하고, 색상변경버튼을 클릭하면
현재 h1 태그의 배경색이 입력된 색상이 되도록 변경
</h1>
<input type="text" id="color">
<button id="change">변경</button>
document.getElementById('change').addEventListener('click',()=>{
let color = document.getElementById('color').value;
let h1 = document.querySelector('h1');
//1. css의 변경 대상과 분량이 많을 경우 (단, 미리 style에 만들어놔야함)
h1.className = color;
//2. css의 변경 대상, 분량도 적을 경우 (대상과 style내용을 직접 지정)
h1.style.backgroundColor = color;
})
</script>
2. css(style)의 속성
style이라는 속성을 통해 css 프로퍼티에 접근 가능
- tagName.style.color
css의 적용은 element.style.property 형식으로 접근 및 변경이 가능
- property는 자바스크립트의 코드 : -(하이픈) 적용안됨, 띄어쓰기 적용 안됨
- css속성의 -(하이픈)을 제거하고, 카멜 표기법으로 변경
사용
Element명.setAttribute(name, value); : element에 속성부여
- 이미 있는 속성이면 업데이트, 없는 속성이면 새속성으로 추가
var obj = document.getElementById("container");
obj.setAttribute("style", "background-color: lightgray; width: 500px; height: 300px;");
<h1>
색상명을 입력하고, 색상변경버튼을 클릭하면
현재 h1 태그의 배경색이 입력된 색상이 되도록 변경
</h1>
<input type="text" id="color" placeholder="색상입력">
<button id="change">변경</button>
<script>
document.getElementById('change').addEventListener('click',()=>{
let color = document.getElementById('color').value;
let h1 = document.querySelector('h1');
h1.setAttribute('style',`background-color: ${color}`);
})
</script>
CSSStyleDeclaration.setProperty(propertyName, value);
- css스타일을 부여할 대상에게 css 프로퍼티 부여
- property : Css 속성이름, value : 속성값
- timeout도 함께 사용하여, 자동으로 사진이 바뀌는 쇼핑몰에서 사용하는 걸 볼 수있음
var obj = document.getElementById("container");
obj.style.setProperty("background-color", "lightgray");
<img src="/image/가위.png" alt="" id="img"> <br>
<input type="text" name="" id="attrName" placeholder="속성 예)style">
<input type="text" name="" id="attrValue" placeholder="속성값 예)width=500px">
<button type="button" id="btn">속성변경</button>
<script>
document.getElementById('btn').addEventListener('click',()=>{
let attrName = document.getElementById('attrName').value;
let attrValue = document.getElementById('attrValue').value;
const img = document.querySelector('img');
img.setAttribute(attrName,attrValue);
// img[arrtName] = attrValue; 로 key,name처럼 사용해도 됨!!
})
</script>
'HTML.CSS.JS > JS' 카테고리의 다른 글
| [JS] DOM_event : document영역에서 사용되는 이벤트 (0) | 2023.04.24 |
|---|---|
| [JS] classList속성 <ul class="ul list iter"> (0) | 2023.04.24 |
| [JS] 할인율 구하기 (0) | 2023.04.24 |
| [JS] 클릭하면 출력onclick, addEventListener (0) | 2023.04.24 |
| [JS] QuerySelector, QuerySelectorAll (getElementId) (0) | 2023.04.24 |